
Negotiation 101:

taplink.cc

Negotiation 101:
taplink.cc


If you grow hostas, you probably have more than one variety in your garden. Mixing and matching foliage colors, leaf sizes and textures is part of what makes them so fun to grow.
My own shade garden includes more than a dozen different varieties and I definitely have some favorites. Over time, I’ve discovered some qualities that separate the good from the great.

Part of what makes a hosta great is how well it fits into the space you give it. For small spaces, look for miniature hostas, such as Blue Mouse Ears or Mighty Mouse. These plants mature at 6 to 10″ tall and are fun to use in containers.
Other varieties, such as Big Daddy and Bressingham Blue, can grow to be waist high and up to 4 feet across. These big-leaved hostas can cover a lot of ground very quickly and are great for underplanting trees.
Most varieties of hostas fall somewhere in between, growing 12 to 18″ tall. With size being so variable, it’s important to choose hostas with your head as well as your heart. Always check the description so you know the mature height and width.
Hostas such as Halcyon and Sum and Substance have foliage that’s a single color. Equally popular are variegated hostas, with foliage that displays two or more colors. This variegation may be subtle, as with hosta Francee’s fine white edge, or bold and dramatic as with Blue Ivory or Lakeside Dragonfly.
When you’re making choices about foliage color and variegation, consider the overall design of the area, as well as your personal preferences. Here are a couple suggestions.
If you’re filling a large area with a dozen or more hostas, plant them in irregular groups featuring three or more plants of the same variety. This will give the planting a sense of flow rather than a choppy stop-start.
When planting more than one type of variegated hosta, separate them with non-variegated varieties to help create a sense of pacing and calm. There are many solid-colored hostas to choose from, with interesting variations in leaf size, color and surface texture.
Most hostas look their best during May and early June, when the foliage is fresh and vigorous. But a really great hosta will maintain its good looks right through August and into the fall.
Generally speaking, I find that the thicker the leaves, the more durable the hosta. Varieties with thicker-than-average leaves are less susceptible to damage from wind and rain. They are also more resistant to hosta loving pests such as slugs and snails.
The texture of the leaves also has a role in durability. Leaves that are puckered or deeply ribbed like corduroy, have extra toughness against wear and tear. There are also some varieties, such as Catherine and June, that have super-smooth leaves with an almost vinyl-like coating.
Hosta plantaginea ‘Aphrodite’
This hosta’s relatively thin with medium green leaves and informal growth habit. It doesn’t meet the qualities for greatness outlined above. However, the large and intensely fragrant, gardenia-like flowers make it a must-have.
In late summer, Hosta plantaginea (commonly known as August lily) displays its snow-white blossoms on sturdy, 2-foot stems that rise well above the foliage. The cultivar ‘Aphrodite’ is a double version of the species. Hosta plantaginea is also one of the most heat-tolerant hostas available.
Hosta ‘Blue Ivory’
This variety features thick, slug-resistant leaves with a bold contrast between the wide, creamy white margins and blue-green centers. Really sparkles in the shade. Mature size is small to medium.
Hosta ‘June’
This hosta has extra-thick leaves with a pretty shape and a tough surface. Each leaf displays three distinctly different greens. Grows slowly and stays compact.
Hosta ‘Liberty’ – This hosta’s big, broad leaves are as thick as cardboard. The leaf margins are buttery yellow in spring and gradually soften to cream. The plants have an upright habit (18″ tall) and stand strong all season long. Wonderful specimen plant.
Source: longfield-gardens
Related: Gardening experts reveal how to use hostas to prevent weeds in your yard – TUTORING YOU


There are some basic survival supplies that we should all carry with us at all times when hitting the trails.
This is true for all hikes regardless of distance. These survival items don’t take up much space and can be carried in a small pack.
Just like in most areas of life, no one ever plans on bad things happening.
I feel that it’s always best to be prepared and not need it, than need it and not be prepared!
It’s extremely easy to become injured while hiking at all levels of experience. Make sure to have a basic first aid kit with you at all times.
You can either purchase a small first aid kit or throw together one of your own.
There are many great ideas for making your own kit on Pinterest. I suggest adding bug repellent wipes or spray into your first aid kit as well.
Make sure to put sunscreen on before heading out—even on cloudy days—as well as carrying some with you to re-apply throughout the day.
Wear a hat and clothing that protects your skin. There are plenty of breathable options that help with protection while still keeping you cool.
Don’t forget your sunglasses to protect your eyes from the harsh UV rays of the sun!
I know this one may not seem so “life saving” but think long term!
Full bottles or a hydration bladder are the most important item in your pack to fend off dehydration and keep you moving comfortably on the trail. As a rule of thumb, pack one liter of water for every hour you plan to be hiking. Beginner hikers can expect to travel about two miles per hour on a moderate trail (factor in more time for steeps), so carry at least two liters of water for a four mile hike. On especially hot days, pack more.
Yes, water is heavy. On long hikes, consider carrying a water filter or purification drops, and locate water sources like streams on a map ahead of time. That way, you can refill partway through the day instead of carrying an uncomfortably full pack.
Don’t have a reusable bottle? Any screw-top bottle—from an old disposable water bottle to a soda bottle—will do.
Rope is one of those items that can really help you out if you’re in a bind (see what I did there).
If you aren’t familiar with it, paracord is an excellent “rope” to bring with you.
There are several wearable items, such as a paracord bracelet, which is perfect for hiking.
Make sure to always carry snacks with you.
I suggest foods that hold and pack well, such as energy bars, trail mix, dried fruit, nuts, jerky, etc.
There are also plenty of items sold specifically for hiking and backpacking but I prefer to just throw my own together as they can become quite costly.
Duct tape is one of those items that is extremely versatile.
It can be used for binding, blisters, making rope, fixing cracked water bottle, bandages, mending clothing, packs, and boots, etc.
They sell small rolls specifically for hiking/backpacking.
You can also buy a normal sized roll and wrap some around the handle of a flashlight, hiking stick, water bottle, or lighter to keep you from having to carry the whole roll.
Emergency blankets have come a long way in the last several years. I recommend something like this Mezonn PE emergency sleeping bag.
It is small, lightweight and can be attached to the outside of your pack. This item is reusable, tear resistant, bright colored, and waterproof. There are multiple uses besides the obvious warmth. It can be used as an emergency signal, rain protection, ground cover, water collector, shelter, etc. and could be a serious factor in your survival.
A headlamp is an important item to carry at all times.
If you get lost or have to be out past dark, having something hands free to illuminate your path is a must. I recommend a waterproof, LED headlamp that also offers SOS flashing to signal help.
Always carry a waterproof fire starter when you are on the trails. A butane lighter or waterproof matches are the easiest option.
I would also recommend carrying something you can easily ignite such as, dry tinder, fire starter, candles, or even compact dryer lint. Carry it in a plastic or dry bag to make sure it stays dry in all situations.
A compass is a must as it can be easy to get turned around in the wild. Make sure to get a high quality compass.
There are plenty of electronics you can use as well but I recommend carrying a good old fashioned compass at all times.
You can never be positive that your electronics won’t fail you, get damaged, or run out of battery.
I always carry a knife (at minimum) or a multi-tool (even better). You never know when you may need one! There are plenty of great multi-tools out there ranging from $10 to all the way over $100 and all can serve a great purpose in a survival situation.
It’s a great idea to always carry an extra layer of clothing with you. This is especially true if you’re hiking in an area with drastic temperature changes.
A whistle is a great emergency tool for hiking. The sound carries further than your voice and is much less tiresome than yelling.
It works in an emergency situation to call for help as well as to locate the rest of your group if you were to get separated.
There are plenty of great options that you can hook directly to your pack. For something so light, it doesn’t make sense not to carry one with you.

It’s a sad sight to see. And it happens every year.
Planters and containers that were once rich with color and foliage slowly fade and fail, becoming worn out and tired looking by the time mid-summer rolls around.
And the higher the temperatures climb, the more those pretty blossoms and plump leaves shrivel and disappear.
Well, this doesn’t have to be your tale of woe this year. You can help your containers to flourish with vibrant good health all summer long just by doing one little thing differently.
Here’s a brief review of the steps that you can take to create and maintain a brilliant display all summer long.
The first step for a robust planter is to choose the correct pot size. This is determined by a few different factors.

A planter that’s too small will crowd roots, resulting in a scarcity of water, oxygen, and nutrients that are vital for healthy, vigorous growth.
Containers that are too big can result in overly moist soil, cutting off oxygen and drowning the roots. And the cool, moist soil often found in planters with too much room is also a welcome mat for plant problems. Fungal growth such as powdery mildew and leaf spot are common visitors, as are damping off and root or stem rot.
Bedding plants, seasonal kitchen herbs, annuals, and bulbs can all be arranged a little closer and tighter than plants in the ground, to make an impressive and healthy visual display.
So, if the recommended spacing is, say, 10-12 inches, item that thrive in containers can be planted about 6-8 inches apart.
Your pot will need drainage holes with adequate drainage material on the bottom, to allow excess water to flow away easily.
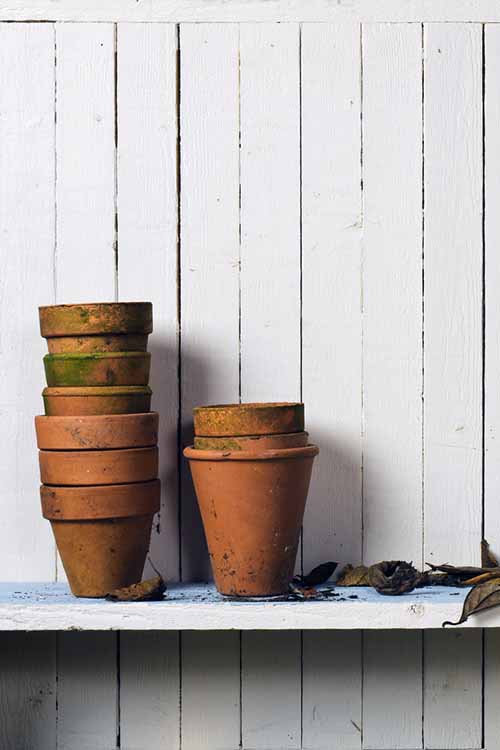
Inverting a smaller plastic pot over the drainage holes will work if adding more weight is an issue, as will using packing chips or peanuts. Gravel, pebbles, pieces of broken pottery, nut shells, pinecones, sticks, and coffee filters can all been used for drainage.
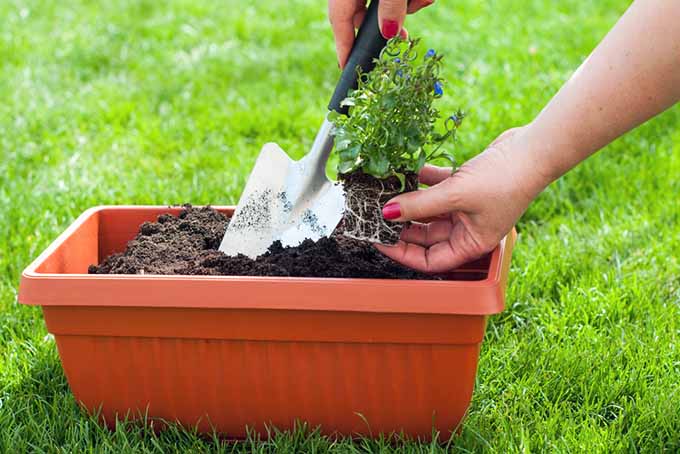
As a rule of (green) thumb, container plants don’t like to have wet feet – that is, having their roots sitting in water makes them unhappy.
A soggy root environment will cause most bedding plants to sulk and underperform. Or the roots may simply rot, which is not conducive for pretty planters!
Drainage is also needed to provide aeration for potted roots, as it’s harder for them to “breathe” and access oxygen in a container than it is for plants in the ground.
For many of us, the garden center has the same effect as a candy shop does on kids. “I want some of these, and six of those, and oh, I need a whole flat of the pretty pink ones…” And as we all know, impulse buying does not always mean we’ve made the best choices!

So, a little discernment (and self-discipline!) will help in selecting plants that will produce the best results for your location.
Choose plants that will thrive in your particular climate and light conditions. And if you like to mix plants together in one pot, select ones that have similar requirements for water and light.
Adding some foliage plants will help to fill out your pots, and they also provide an element of unity – pulling the overall picture together for greater visual appeal.

The addition of plants with varying heights and bloom times will also add a dynamic visual interest to your potted gardenscape, changing as the season progresses.
Summer flowering bulbs like gladiolas, canna lilies, arums, and caladiums will extend the season, providing fresh color and interest while earlier bloomers take a rest.
How good is it to be a fully grown adult and still be able to play in the dirt?!

However, we’re not serving up mud pies anymore. As garden stewards, we need to provide a nutrient-rich environment to ensure that our bedding plants thrive.
Amending your soil with about 20-25% finished compost or well-rotted manure improves the soil in a few different ways. It develops the soil’s tilth, or body structure, which helps with the retention of moisture and nutrients, and reduces soil compaction.
Container soil is best when it has some moisture-retaining materials in the mix, such as perlite, vermiculite, sphagnum moss, or peat, at about 20% of the volume. It also needs nutrient-rich materials such as compost or manure.
Amending your soil with about 20-25% finished compost or well-rotted manure improves the soil in a few different ways. It develops the soil’s tilth, or body structure, which helps with the retention of moisture and nutrients, and reduces soil compaction. Plus, it can act as an equalizer for soils that have lost their pH neutrality.
Use a large bin, wheelbarrow, or a layer of plastic on the ground to mix up all of your ingredients in batches large enough to accommodate several pots. And if you purchase a growing mix, ensure that the texture is light and loose enough to provide ample drainage while still retaining some moisture.

If you like to recycle last year’s container soil, replace at least half to two-thirds with fresh soil, recycling any depleted dirt into your compost bin.
Of course, you should never recycle or compost any soil that has had diseased or failing plants grown in it. Spores, fungus, mites, and other unfriendlies can live on in the soil long after the plants have been removed – and they can be nestled in the dirt even with plants that look healthy. A safer option is to use fresh soil for each pot.
By the time summer arrives, containers in a sunny location require frequent, even daily, watering when it’s hot out.

However, not all pots require watering at the same time. Differences in light exposure, pot size, and plant size determine how often water is required.
Strong, healthy plants need strong, healthy root systems, which are developed by deep, slow watering. Light watering will develop small, shallow roots just under the surface. This leaves the larger roots at the bottom deprived of moisture, which causes plants to become dehydrated and fail.
Water slowly to ensure the entire root ball, including the deepest roots, gets a good drink, or just until water starts to emerge from the drainage holes.
During the growing season, give your containers a light grooming session every couple of weeks.

Deadhead spent blossoms, cut back straggly stems, and if needed, replace any plants that have given up.
Container gardening has no more pests or problems associated with it than ground plantings. But due to their close quarters and reduced air circulation, the spread of fungi and pests can be rapid.
To keep remaining plants free of infestation, any diseased specimens need to be removed pronto. Difficult to control, some prevention can be accomplished with regular spraying of new foliage with neem oil.
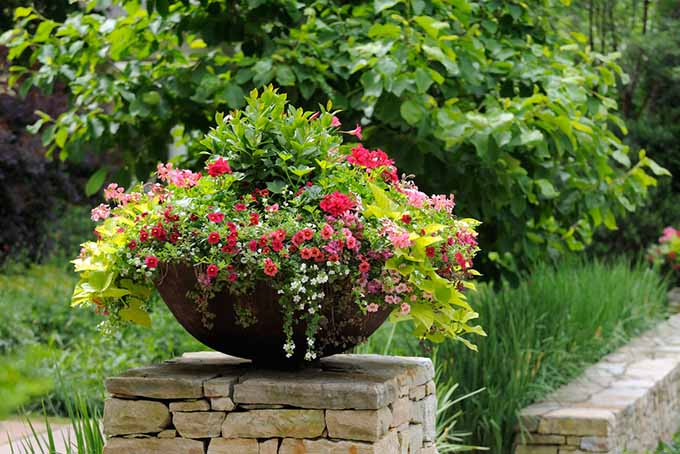
As the summer progresses, you can also freshen your containers with the addition of late-season performers like mums, autumn sedums, asters, calendula, and violas.
And now, for the trick we’ve all been waiting for…
That’s it. When practiced regularly, this is the one simple tip that will significantly improve the performance and appearance of your planters and containers.

The addition of a slow-release fertilizer is always a good idea, and every planting should be finished off with granules that will feed slowly. A better idea is to give your containers a diluted drink of water-soluble fertilizer every two weeks, and even weekly for small pots that require frequent watering.
Every time a container is watered correctly, to the point of water coming from the drainage holes, it flushes nutrients out of the pot and away from the roots. This is problematic…
The reason is simple. Every time a container is watered correctly, to the point of water coming from the drainage holes, it flushes nutrients out of the pot and away from the roots. This is problematic, because unlike plants grown in the ground that can expand to find food, the roots are limited to an area within the container walls, with no access to fresh dirt and nutrition.
The answer is to supplement with a diluted solution of an all-purpose, water-soluble fertilizer on a weekly or bi-weekly basis. A general purpose fertilizer of 24-8-16 (24% nitrogen, 8% phosphorous, and 16% potassium) will maintain and feed your plants in pretty much any environment, but specific formulas (such as for tomatoes or annuals) may be selected to cater specifically to your chosen plantings.
Take care to heed the word dilute. Too much fertilizer is just as bad (if not worse) than too little, and will cause plants to grow and display fast and bright – but they’ll also burn out and fail quickly, too.

Over-fertilizing can cause plant leaves to turn yellow or brown, and damages roots. “Burning” is caused by the naturally occurring salts in fertilizers, which draw moisture out of the plant. Too much, and the most susceptible areas of the thin tips and edges will brown first, followed by the entire leaf.
To find the Goldilocks zone for fertilizing containers, take the recommended dosage for the product you’re using, and divide it by how frequently you’ll be fertilizing. For example, if the recommended amount is one “scoop” per month, divide the amount by 2 for bi-weekly feedings, and by 4 for weekly fertilizing. Mix into a full watering can and apply to moist soil.
Quick and easy, just as tips and tricks should be!
As caretaker of your lovely container gardenscape, you’ll also want to keep an eye on your plants to see how they’re responding to your care and maintenance regime. If they’re not flourishing, they’ll communicate their needs by their appearance.
So remember, to retain their healthy good looks for the entire season, feed your planters more frequently, but with weaker doses of a water-soluble fertilizer. This is simple but effective, and you’ll be thrilled with the results.
Article by Lorna Kring of Gardeners Path

Article by Deborah Ng
One out of every four deaths in America is attributed to heart disease, making it the number one cause of death in this country. However, heart disease may be avoidable. Heart health may be maintained with proper nutrition, regular exercise, and eliminating risk factors such as excessive drinking, smoking, and obesity. For many people, having a healthy heart means undergoing a lifestyle change.
Why is a heart-healthy diet important?
Proper nutrition and exercise may help combat heart disease. Foods that are high in sodium, added sugars, and unhealthy fats may lead to high blood pressure, high cholesterol, and clogged arteries, increasing the risk of heart attacks, heart disease, and stroke. People who smoke, suffer from obesity, and lead a sedentary lifestyle, may further increase that risk.
What is a heart-healthy diet?
Eating for heart health includes adding lean proteins, fruits and vegetables, low fat or fat-free dairy products, and whole grains while cutting out, or at least limiting, foods that are high in sodium, sugars, and the unhealthy trans and saturated fats.
People who are interested in heart-healthy eating should discuss making a lifestyle change with their healthcare practitioner, who can make dietary recommendations based on individual needs.
Recommended heart-healthy foods include:
Foods to avoid in a heart-healthy diet:
Making a lifestyle change
A heart healthy lifestyle change should start sooner rather than later. The first step is to visit a doctor or healthcare practitioner who can make recommendations and give guidance based on an individual’s health history. After an examination, the doctor will discuss foods to eat and avoid, how many calories to consume, and how to get started with an exercise routine.
A heart healthy diet doesn’t have to be a bland diet. Rather than seasoning food with salt, try using fresh herbs and spices, aromatic vegetables, and unsalted broth to give food more flavor. Instead of sweet drinks, try adding fresh fruit or berries to water for flavor and health benefits.
A lifestyle change also means making time for regular exercise. The American Heart Association recommends getting in at least 30 minutes of moderate intensity aerobic exercise at least five days per week. As the body gets stronger and leaner, adding more vigorous cardio and strength training is recommended.
The key to a healthy lifestyle change is establishing a routine. Heart-healthy habits include:
A heart-healthy lifestyle could lead to a longer life. When it comes to eating for heart health, it’s better to establish good habits sooner rather than later.
Photo credit: answersforelders.com

You can’t go outside without sneezing, your nose won’t stop running, and you have this urge to keep itching your eyes.
These are the symptoms of seasonal allergies, otherwise known as hay fever. Most likely, yours are caused by pollen from certain types of trees, grasses, or weeds.
Unfortunately, there’s not much you can do to avoid pollen triggers. But there are a wide range of home remedies, medications, and long-term treatments that can help relieve your symptoms.
Here’s what you need to know to get your seasonal allergies under control.
It’s not always possible to fully get rid of your allergies — but there are many ways you can relieve or manage your symptoms.
If you’re looking to relieve your symptoms fast, Insider Reviews has a buying guide for the best allergy medicine and home remedies, including:
The type of medicine or remedies you’ll need will depend on your symptoms. Here’s how to know when you should use each type of treatment.
Over-the-counter allergy medicine is one of the most common and effective treatments for seasonal allergies.
These are the main differences between each type of allergy medicine:
Antihistamines are the first-line defense for seasonal allergies. When you have an allergic reaction, your body releases histamines, which cause the main allergy symptoms.
Antihistamines counteract these histamines — hence the name antihistamine — and can help you stop sneezing, or get rid of a runny nose. These oral antihistamine medications are widely available over-the-counter.
If you want to clear a stuffy nose with allergies, you might want to try a decongestant.
Decongestants can help clear nasal congestion by shrinking the blood vessels in your nose, allowing you to breathe more easily. They are widely available over-the-counter, and common examples include Mucinex or Sudafed.
In fact, some allergy medications offer both antihistamine and decongestant, all-in-one. These combination medicines often have a ‘D’ at the end — like Claritin-D or Allegra-D.
Other home remedies, like a neti pot, can also clear your sinuses and reduce nasal congestion.
Nasal sprays can reduce nasal congestion, and may be used to relieve a stuffy nose, runny nose, or sneezing.
There are many different types of nasal sprays. For allergies, you should consider:
Eye drops may be necessary if your allergies especially affect your eyes. This is called allergic conjunctivitis, and its symptoms include:
If you suffer from allergic conjunctivitis, you should talk with your doctor about choosing the right eye drops for your allergies.
Sometimes, you may need a combination of these medications to resolve all your allergy symptoms, but you should check in with your doctor first.
If over-the-counter medication doesn’t resolve your allergy symptoms, your doctor may also recommend a stronger version of these drugs, which may require a prescription.
If none of these treatment methods work, you may want to consider allergy shots.
Allergy shots, also called immunotherapy, are a series of low-dose allergen injections that can decrease your sensitivity to allergies and reduce your symptoms over time.
Immunotherapy is a long-term commitment — you’ll typically receive shots over a period of three to five years — but they can be very effective at managing seasonal allergy symptoms when they flare up.
If your allergy symptoms are severely impacting your life, and you can’t control them with home remedies or medication, allergy shots may be worth it. Talk to your doctor to see if immunotherapy is right for you.
Sorry cat lovers, but the article by Camryn Rabideau says dogs. However, some items could be cat inclusive, like this one:

Do you frequently feel like you’re a doorman for your dog? Save yourself the hassle of letting your pet in and out of the house all day with the SureFlap Microchip Pet Door, which retails for around $85. This high-tech door is designed to read your pet’s microchip. It only unlocks when an approved chip is in range, so you never have to worry about wildlife or stray animals getting into your home. You can even program the door to lock/unlock at specific times, in case you don’t want your pet outside at night or while you’re at work. No microchip? SureFlap also sells programmable collars you can use as an alternative. (Can’t cats be microchipped too) ?
Or this one:

If you’ve ever wished you could video chat with your dog while you’re at work, now you can! The PetChatz Interactive Pet Camera is a videophone that lets you have two-way calls with your pet, and it can also dispense treats and calming aromatherapy scents. The main camera unit costs $350, and you can purchase separate “PawCall” buttons that allow your pet to call you. How cute is that? OK, cute. Aren’t cats cute too?

OK, this one is dog only. Really!
The Bissell BarkBath is a 2-in-1 portable dog wash and deep cleaner that can wash your carpet, furniture, upholstery or even your dog! The special spray nozzles get water down to your dog’s skin for a deep clean, all while providing gentle suction that pulls dirt and water back into a separate dirty water tank. This $200 system allows you to give your dog a bath just about anywhere without making a mess, and it can also be used as a portable carpet cleaner to boot.
Any self-respecting cat would turn up her nose before getting into this contraption (and head for the hills!)

